Before You Begin
Before installing DriveWorks Solo please ensure the Prerequisites have been met on the machine the module is to be installed on.
During installation an internet connection is required to download and verify the root certificates that ensure the software you are installing is genuine and trusted.
If an internet connection is not available on the computer the software is being installed, please contact support@driveworkssolo.com
Download Latest Version
The latest version of DriveWorks Solo is available from:
https://my.driveworks.co.uk/software/
Your User Name and Password is required to log into your account.
Once logged in you will be directed to the download page. Each major version can be accessed from the tabs, each service release is listed under each tab. The most current major release is shown by default.
We always recommend installing the latest major version and service pack.
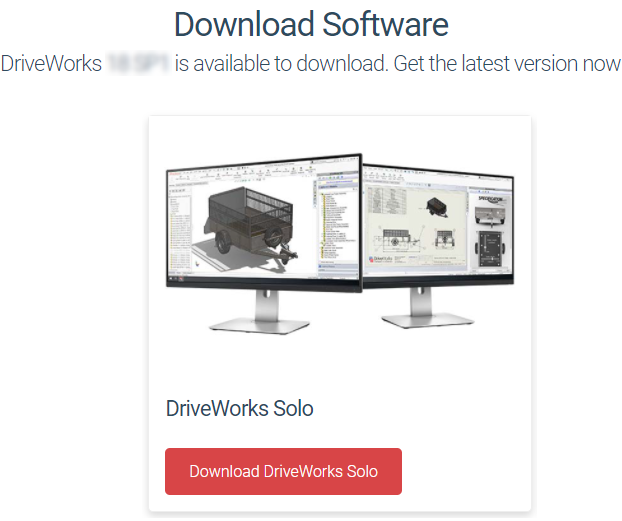
Click the link to begin the download.
The release date and version number are given in the information box with the download link.
Service Pack Upgrade
If you are upgrading your current version of DriveWorks Solo to the latest service pack
Please follow the instructions below before installing your new Service Pack.
Backup!
Always take a backup of your DriveWorks data before upgrading:
Uninstall Previous Service Packs
Please uninstall the previous Service Pack of the version being upgraded before installing the new service pack.
DriveWorks Solo and DriveWorks Pro
DriveWorks Solo and DriveWorks Pro can be installed on the same machine as long as their major versions and service packs match.
If you are running an older version, please upgrade DriveWorks Solo before installing DriveWorks Pro.
To find the version of DriveWorks Solo you are currently running please click here (internet connection required) and follow the instructions.
Installation
The following gives information on the installation files and process.
Installation Files

A single installation file is shipped or made available for download.
The installation process automatically detects the system type and installs the appropriate components based on if your system is 32 or 64 bit.
The installation file also includes all necessary pre-requisites.
Installation from a downloaded file will require the appropriate file to be double clicked to start the installation.
Installation Step by Step
On the machine that the DriveWorks module is to be installed on, double click the installation file.
The installation process installs any 3rd party pre-requisites either:
- Silently - If there are no License terms to accept.
- Integrated into the DriveWorks installer - If there are License terms to accept.
The installation process is divided into the following few steps:
| Step 1 |  | Once downloaded, double click the installation file on the machine the DriveWorks product is to be installed on. |
|---|---|---|
| Step 2 | 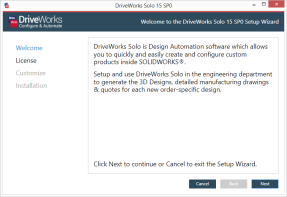 | Click Next to begin the installation. |
| Step 3 | 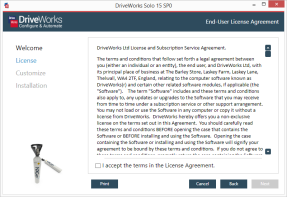 | Check the "I accept the terms in the License Agreement." box. Click Next. |
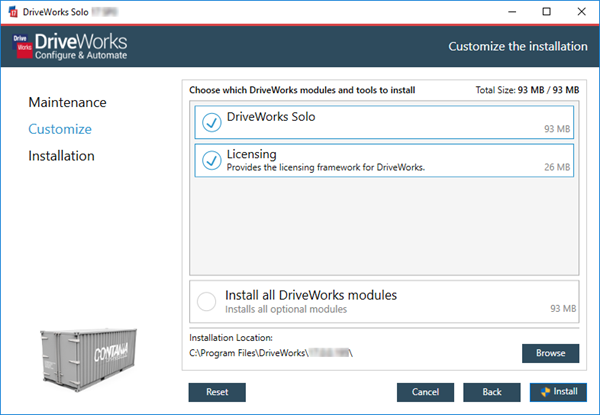
| Step 4 | 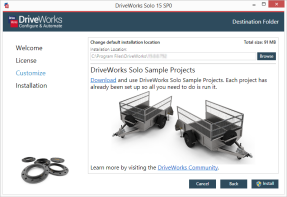 | Verify the install location. Click Browse to locate an alternative location. If a related DriveWorks product is installed the location cannot be changed. Click Install to begin the installation. |
| Step 5 | 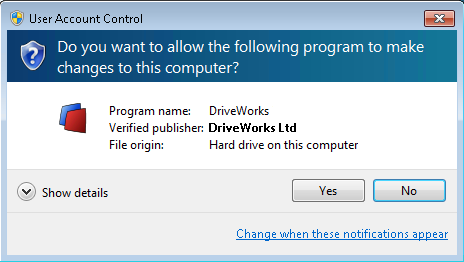 | If you see the User Account Control message click Yes to allow the installation to make changes to your computer. |
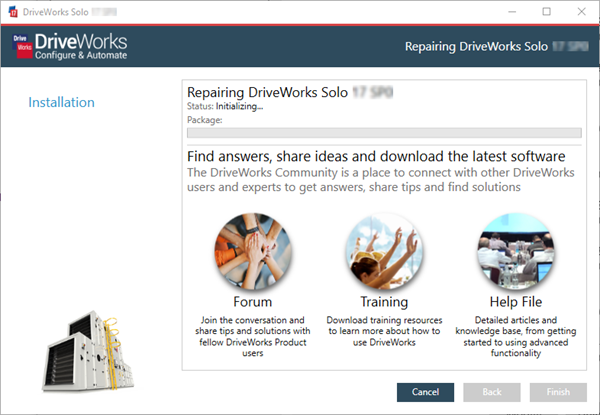
| Step 6 | 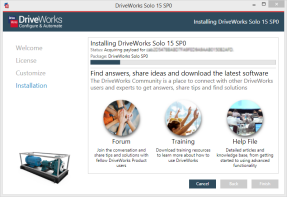 | A progress bars indicates the status of the installation. |
| Step 7 | 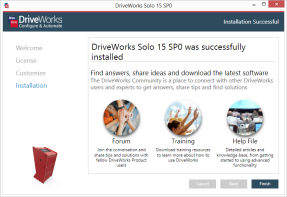 | Click Finish to complete the setup and exit. |
Troubleshooting Installation
- Double clicking the DriveWorks installation file has been known
to launch the installer for another product.
Once the DriveWorks Pro installation file is double clicked the necessary components are extracted to a temporary location, which is:
C:\Users\ Currentuser\AppData\Local\Temp.
If the installation launches the install of another application please ensure this directory is empty and run the DriveWorksPro installation file again.
Repairing or removing individual modules after installation requires the installation files extracted to the Temp location above. If the installation file was downloaded we recommend saving the file to a backup location to ensure the installed application(s) can be repaired or modified in future.
Uninstalling and Maintenance Wizard
Return Licenses
Uninstalling the DriveWorks application will not remove any information for licenses that have been activated on the computer.
To remove licensing information (For instance when the machine hosting the application is to be changed) please refer to the section To Return a License in the License Management topic.
Before carrying out any uninstallation or maintenance please ensure all applications that run DriveWorks Solo are closed. This includes:
- DriveWorks Solo Project Designer
- DriveWorks Solo Compiled Help File
- DriveWorks Solo License Management
- SOLIDWORKS
Repairing or removing individual components after installation requires the use of the installation files extracted to the C:\Users\Currentuser\AppData\Local\Temp location.
If this location has had its contents removed the original installation file will need to be extracted to continue the repair.
If the installation file was downloaded we recommend saving the file to a backup location to ensure the installed application(s) can be repaired or modified in future.
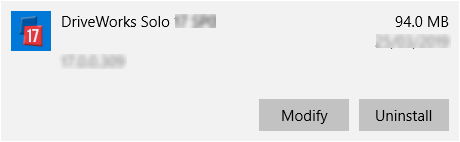
Access to Uninstall and the Maintenance Wizard is done through Windows > Apps & features.
- In the Windows search bar, type Apps & features
- Select the Apps & features program to launch
- Locate DriveWorks Solo from the Apps list and select
Continue to follow the appropriate steps below:
Uninstall
To completely uninstall DriveWorks Solo:
- Click Uninstall from the DriveWorks Solo Apps & features listing.
- Click Yes on the User Account Control to allow the program to make changes.
- Click Yes on the prompt that appears asking "Are you sure...".
- The program will be removed.
Modify
Modify allows the location DriveWorks Solo was originally installed to be changed and any additional features to be removed or added.
To modify the DriveWorks Solo installation location:
- Click Modify from the DriveWorks Solo Apps & features listing.
- Click Yes on the User Account Control to allow the program to make changes.
- Select Modify Installation from the DriveWorks Maintenance Wizard.
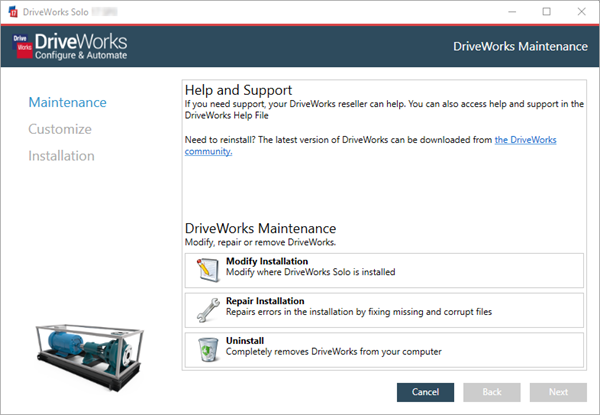
- Select the components to remove, or Browse to browse to a new installation location.
- Click Install to begin the modification.
Repair
Repair allows errors in the installation to be repaired by fixing missing or corrupt files.
To repair the DriveWorks Solo installation location:
- Click Modify from the DriveWorks Solo Apps & features listing.
- Click Yes on the User Account Control to allow the program to make changes.
- Select Repair Installation from the DriveWorks Maintenance Wizard.
- The DriveWorks Maintenance Wizard will immediately begin to attempt the repair.
- Click Finish when done.
Each major version of DriveWorks has periodic service pack releases. This is to ensure the software stays current with all updates applied to operating systems and other applications that DriveWorks integrates with. Service packs can also include new functionality, enhancements and bug fixes.
Each major version of DriveWorks has periodic service pack releases. This is to ensure the software stays current with all updates applied to operating systems and other applications that DriveWorks integrates with. Service packs can also include new functionality, enhancements and bug fixes.
- Welcome
- What's New
- DriveWorks 23
- Older Versions
- DriveWorks 22
- DriveWorks 21
- DriveWorks 20
- DriveWorks 19
- DriveWorks 18
- DriveWorks 17
- DriveWorks 16
- DriveWorks 15
- DriveWorks 14
- DriveWorks 12
- What's New DriveWorks 12
- Form Design
- Rule Builder
- Model Rules
- DriveWorks Add-in for SOLIDWORKS
- SP1
- SP2
- DriveWorks 11
- Welcome to DriveWorks Solo 11 What's New
- Capturing
- Project Designer
- Installation
- Licensing
- SP1
- SP1.1
- SP2
- SP3
- V10
- V9
- V8
- SP0
- SP1
- SP2
- SP3
- V7
- Before You Begin
- Using DriveWorks Solo
- DriveWorks Solo Inside SOLIDWORKS
- Enabling the DriveWorks Solo Add-ins in SOLIDWORKS
- Project Wizard
- Capturing Models
- Captured Models
- Part Mode
- Assembly Mode
- Drawing Mode
- Run
- Run (Layout Mode)
- Project Designer
- Project Designer
- Stage 1: User Interface
- Stage 2: Data and Rules
- Stage 3: Output Rules
- Writing Rules
- Writing Rules
- Rules Builder
- Extract Variable
- Edit Variable
- Rule Builder Settings
- Document Rules
- Model Rules
- Model Rules Overview
- Parts and Assemblies
- File Name
- Relative Path
- Configuration
- Feature
- Dimension
- Tolerances
- Custom Property
- Instance
- File Formats
- Advanced Feature Parameter Rules
- Model Rules Advanced Feature Parameter Rules - Overview
- Boss/Base Features
- Boss/Base Thin
- Break Corner
- Chamfer
- Circular Component Pattern
- Circular Pattern
- Coordinate System
- Cosmetic Thread Features
- Curve
- Curve Driven Pattern
- Curve Through XYZ Points
- Cut Features
- Distance Mate Features
- Draft
- Edge Flange
- Features
- Fillet
- Hole Wizard Features
- Linear Component Pattern
- Circular Pattern
- Linear Pattern
- Lofted Bend
- Mates
- Mold Features
- Offset Surface
- Pattern Driven Component Pattern (Derived)
- Patterns with Advanced Feature Parameters
- Revolved Boss/Base
- Revolved Boss/Base Thin
- Rib
- Ruled Surface
- Sheet Metal Features
- Simple Hole
- Sketch Driven Pattern
- Slot Mate
- Surface Features
- Sweep Thread
- Table Driven Pattern
- Var Fillet
- Weldment Features
- Wrap
- Drawings
- Functions
- Functions
- Conversion
- Cryptography
- Date and Time
- File System
- Helper
- Lambda
- List
- Logical
- Math
- Specification
- Table
- CountIF
- CSVFromTable
- Dcount
- DMax
- DMin
- DWHLookup
- DWVLookup
- GetTableValue
- HLookup
- ListAll
- ListAllConditional
- ListAllConditionalDistinct
- ListAllDistinct
- SumTableColumn
- TableAppendColumns
- TableAppendRow
- TableAppendRows
- TableAverage
- TableBreak
- TableColumn
- TableColumnLookup
- TableCombine
- TableDistinct
- TableDistinctCount
- TableDistinctSum
- TableFilter
- TableFilterAll
- TableFilterByList
- TableFormat
- TableFromCsv
- TableFromList
- TableGetColumnCount
- TableGetColumnIndexByName
- TableGetDataRows
- TableGetHeaderRow
- TableGetRowCount
- TableGetRows
- TableGetValue
- TableJoin
- TableMax
- TableMaxValue
- TableMin
- TableMinValue
- TableRemoveBlankColumns
- TableRemoveBlankRows
- TableRemoveColumn
- TableRemoveRow
- TableReplaceHeaderRow
- TableReplaceHeaders
- TableReplaceRow
- TableReverse
- TableRow
- TableSearch
- TableSelectColumns
- TableSequence
- TableSkipRows
- TableSort
- TableSortByDate
- TableSortByList
- TableSubstitute
- TableSum
- TableTakeRows
- TableTranspose
- TableWithSequence
- VLookup
- Text
- Validation
- Variables
- Knowledge Base
- Concept
- How To
- How To: SolidWorks Best Practices
- SOLIDWORKS Best Practices (KB13103019)
- SOLIDWORKS Features
- How To: Correctly Format Text
- How To: Backup a Project (KB13022601)
- How To: Change A Static Property To A Dynamic Property (KB13111201)
- How To: Create A Cut Down Project (KB17092602)
- How to: Create and Install Project Templates
- How To: Determine the Version of DriveWorks Solo
- How To: Diagnose Project Issues
- How To: Diagnose Project Issues Using On Demand Generation Report
- How To: Diagnose Project Issues Using The Form Designer
- How To: Diagnose Project Issues Using The Rules Builder
- How To: Diagnose Project Issues Using SOLIDWORKS
- How To: Drive the Color of a Part (KB12121016)
- How To: Drive the Material of a Part
- How To: Drive the Texture of a Part (KB13103010)
- How To: Find DriveWorks Solo License Keys
- How To: Implementation Guide
- How To: Reference Control Properties (KB16010601)
- How To: Rename a Project
- How To: Replace a Component With a Static or Driven Replacement Model
- How To: Replace An Instance With A Driven Replacement Model
- How To: Maintain Rules For An Existing Model When It Becomes A Child Of A Parent Assembly
- SOLIDWORKS Best Practices (KB13103019)
- How To: Troubleshoot Licensing
- How To: Troubleshoot WebView2 Runtime Installation (KB25102401)
- How To: Work With Arrays
- How To: Use Filters (KB15111101)
- Info
- Form Control Properties
- Color
- Border Style
- Border Width
- Button Layout
- Caption, Text (Appearance Property)
- Caption Horizontal Alignment
- Button and Caption Width
- Character Limit
- Check Alignment, Option Alignment
- Checked
- Check Size, Radio Size, Button Icon Size, Toggle Size
- Clear Selection Allowed
- Decimal Places
- Default Value
- Display Value
- Enabled
- Error result
- File Name
- Font
- Height
- Hide Characters
- Hover, Text Underline
- Hyperlink
- Button Icon Style
- Increment
- Inset Track
- Input Spacing
- Items
- Left
- Link Behavior
- Maximum
- (Metadata)
- Minimum
- Multiline
- Name
- Number Of Rows
- Opacity (Disabled)
- Orientation
- Override Rule
- Padding, Input Padding, Unit Padding
- Picture
- Picture (Checked), (Hover), (Selected), (Pressed)
- Picture Size Mode, Size Mode
- Picture Style
- Placeholder Text
- Border Radius
- Read Only
- Reverse Direction
- Selected Item
- Selected Item Removed Behavior
- Show Border
- Show Check, Show Option
- Show Limits
- Show Toggle Indicators
- Size Mode
- Tab Index
- Tag
- Text Horizontal Alignment, Toggle Alignment
- Text (Label Control)
- Text, Value (Behavior Property)
- Text, Vertical Alignment
- Thumb Height
- Thumb Image
- Thumb Image Size Mode
- Thumb Margin
- Thumb Padding
- Thumb Width
- Tooltip Duration
- Tooltip Text
- Top
- Track Color
- Track Color (Fill)
- Track Fill Start Value
- Track Size
- Visible
- Width
- Word Wrap
- File and Template Locations
- Info: DriveWorks File Extensions (KB13022602)
- Info: File and Template Locations (KB13103001)
- Template Files
- Lists and Preferences
- Reporting
- Help File
- General Information
- Info: Dangling Dimensions
- Info: Distributing A Solo Project
- Info: DriveWorks Solo Limits
- Info: Instant3D
- Info: Keyboard Shortcuts (KB13103004)
- Info: Known Issues (KB13103005)
- Info: Legal Notices
- Info: Microsoft .NET September 2022 Update Crash (KB22101401)
- Info: Mirrored Components
- Info: SOLIDWORKS System Options (KB12121012)
- Info: Special Variables
- Info: Supported DriveWorks Versions (KB13103006)
- Info: Third Party Information And Downloads
- Info: Microsoft Windows Support (KB13010803)
- Info: Working With SOLIDWORKS Enterprise PDM
- Glossary